During installation, care must be taken to ensure the integrity of the electrical system. If one or more conductors are damaged, the baseboard heater must be repaired by a qualified electrician.

For the assembly you need the following tools, which are not included:
Gloves
Spirit level
Measuring tool
Drill with drill bit suitable for the wall material
Screwdriver

Remove the front panel of the heating strip by pulling on the upper edge as shown. Please do not tear off the wiring.
Position the mounting profile on the wall and ensure a straight, snug fit against the wall.
In addition, make sure that the skirting board is installed above the floor covering.
If several baseboard heaters are to be installed next to each other, connect them with the enclosed connecting elements.
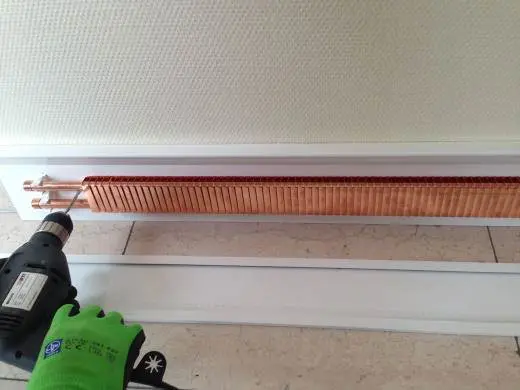
Drill the holes approx. 60mm deep into the wall using an 8 mm drill bit. Place the enclosed dowels in the drilled holes and push them all the way into the hole. Screw the mounting profile in place with the enclosed screws.

Check that there are no loose cables hanging down.
The earth (green-yellow cable) should be connected to the cover panel. If not, connect the cable to the connector on the cover panel.
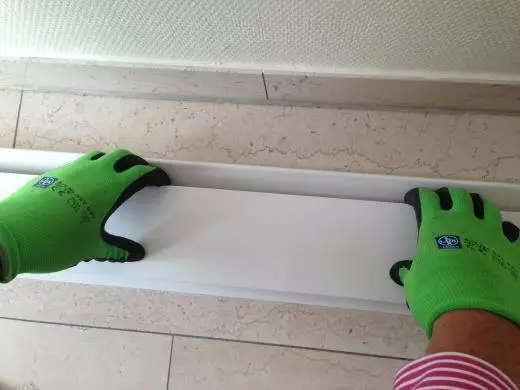
Refit the front panel.
To do this, place the plastic cams on the lower side against the bracket (see illustration on the left) and then tilt the front panel towards the mounting plate. Press until the bracket is locked in place. Make sure that all brackets are engaged.
To connect to the power supply, remove the front panel of the baseboard heater by pulling on the upper edge as shown. Plug the enclosed cable into the corresponding connection.
Refit the front panel. To do this, place the plastic cams on the lower side against the bracket (see illustration on the left) and then tilt the front panel towards the mounting plate. Press until the bracket is locked in place. Make sure that all brackets are engaged.
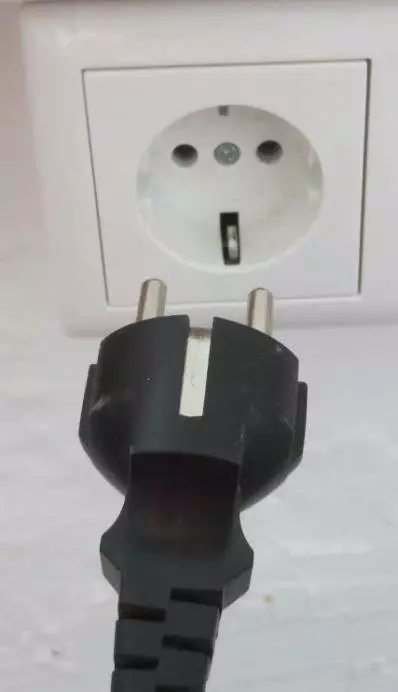
Insert the plug into a suitable socket of your house connection.
The installation of a skirting board heating system is extremely simple, which also makes it easy to assemble and install in older or even listed buildings. It is not necessary to chisel open walls or lay water pipes or cables. Baseboard heaters from Energy-com can be integrated into almost any room quickly and in a space-saving manner without extensive conversion work and can be used both in new buildings and in the renovation of old buildings. The entire construction is mounted on the entire wall by means of a powder-coated and aluminium basic wall panel and covered by a cover panel. It makes no difference whether you choose a water-bearing baseboard or a electric skirting board heating, because the base panel, cover panel and heating register make up the main structure of your skirting board heating in both variants. You can install this yourself in just a few steps. The additional components such as plastic brackets, end pieces and butt connectors are part of the typical accessories that you must also order.
While the water-bearing models, similar to underfloor heating, are connected to the water circuit by means of a distribution system or via a thermostatic valve, the electric baseboard heating is connected to the power supply. Select the wattage that suits your individual needs, which can be between 125 and 575 watts for the electric baseboard heaters and between 88 watts and 420 watts for the water-guided models. We will be happy to assist you in selecting the appropriate wattage. The electric baseboard heater is connected to the TS radio room thermostat via a wireless radio control using a switch socket, allowing you to set and regulate the desired room temperature.
The heating elements are each supplied in a length of 2.5 m and can be cut to any wall size with the help of a mitre saw, so that a simple assembly is always guaranteed, which fits perfectly to your spatial conditions. Mitre pieces from our accessories catalogue help when laying around corners at precise angles.
The connections are to be made with commercially available solder or press fittings. The standard colour is "pure white" (RAL 0916). However, for a visually matching room design, the trims can be supplied in any RAL colour as desired. In this way, both the water-bearing version and the electric heating strip can be perfectly matched to the room appearance. For a continuous baseboard length of more than 15 m, an expansion compensator must be used between the copper pipes for the water-bearing baseboards. The expansion compensator is included in our delivery programme.
You will find detailed information on the installation of baseboard heating strips including helpful pictures in our installation instructions!